Suspension
The car is set up at the factory, but the alignment should be checked after extended transport. Ride height may have been raised for ease of loading. The final settings should be arrived at by testing for the particular driver’s preference and the particular circuit. Try to check the tire temperatures for balance across the contact patch within one minute of a fast lap. The inside edge can be 10°-15° higher than the outer edge. A good starting point is the following:
FACTORY RECOMMENDED SETTINGS
FRONT |
|
|
Camber |
-1˚ |
|
Toe Out |
1/32 (per wheel) |
|
Tire Press. (Cold) |
12psi |
|
Tire Press. (Hot) |
19psi |
|
Ride Height |
1.25 (note 1) |
|
Anti-Roll Bar |
Not used |
|
REAR |
|
|
Camber |
-3/4˚ |
|
Toe In |
1/32 (per wheel) |
|
Tire Press. (Cold) |
13psi |
|
Tire Press. (Hot) |
19psi |
|
Ride Height |
1.5 (note 2) |
|
Anti-Roll Bar |
Not used |
Note 1: measured from the diffuser throat (flat part) to ground
Note 2: measured at the mouth of the tunnel to ground
These heights may be too low for a rough race track (they are optimum settings for a smooth track). Pay attention to how much wear you are showing on your skid blocks.
TIRES
Recommended Goodyear compounds:
- Hot weather R250
- Cool weather R160
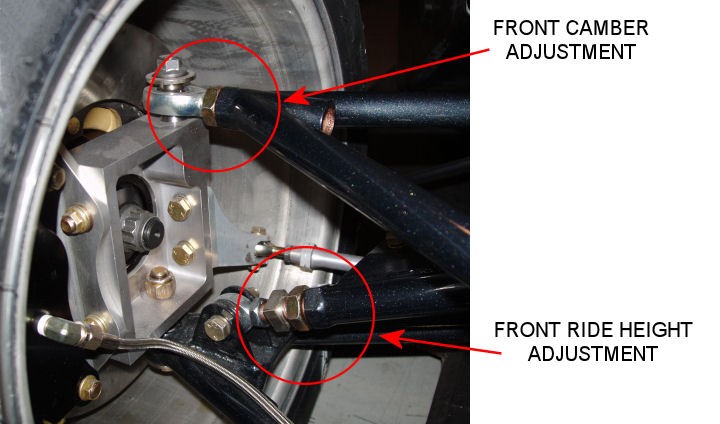
FRONT CAMBER
Front camber is adjusted using the large rod end in the upper a-arm, outer end. Loosen the 15/16" nut and back off the 5/16 hex threaded tube inside the a-arm.
REAR CAMBER
Rear camber is adjusted by shims. The inner end of the upper a-arms are attached to brackets which must be loosened, then shims are added or removed behind the bracket. More shims gives more positive camber.
FRONT TOE
Front toe is adjusted using the steering link from the steering rack. There are left and right handed rod ends in each link. A groove in the end of the link indicates the left hand rod end. Loosen the check nuts on each rod end, and turn the link using the hex in the center.
REAR TOE
Rear toe is adjusted using the same type adjuster nut as the pushrods, only this toe nut is on the forward, upper a-arm link.
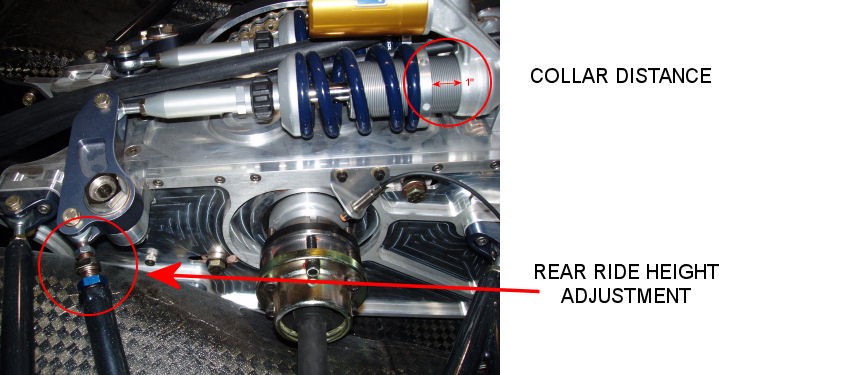
RIDE HEIGHT AND SPRING COLLARS
Set ride height initially by adjusting the shock spring collars.
Front collar distance and rear collar distance (see below) = 1" (with 4" long springs)
These distances may vary depending on overall shock length. Call if something doesn’t look right.
Then use the adjuster nuts on the pushrods for all further ride height adjustment. The square nut requires a ¾" wrench (front). It is a right hand thread. The rod end is left handed, so turning the ¾" nut will lengthen or shorten the pushrod.
Lower the ride height until you notice some rubbing on the skid blocks, then raise the car slightly and record the setting for that track.
Rear adjustment
Front adjustment